The matching tool allows the user to manually assemble 2 scans of objects using information they have in common. Typical situations include : wax-up bridge (upper and underside to match), solid model with preparations scan type (main jaw and preparations to match) and full jaw antagonist (upper and lower jaws to match).
For some objects, two scans of the object need to be performed. For example, when scanning a wax-up bridge, 2 scans of the wax-up bridge are required for the scanning, one from below the wax-up bridge and one from the top. The software automatically matches both scans to create a complete image of the wax-up. In some cases automatic matching may not yield good results. In these cases, the user will need to manually match the scans using the Matching tool.
 |
||
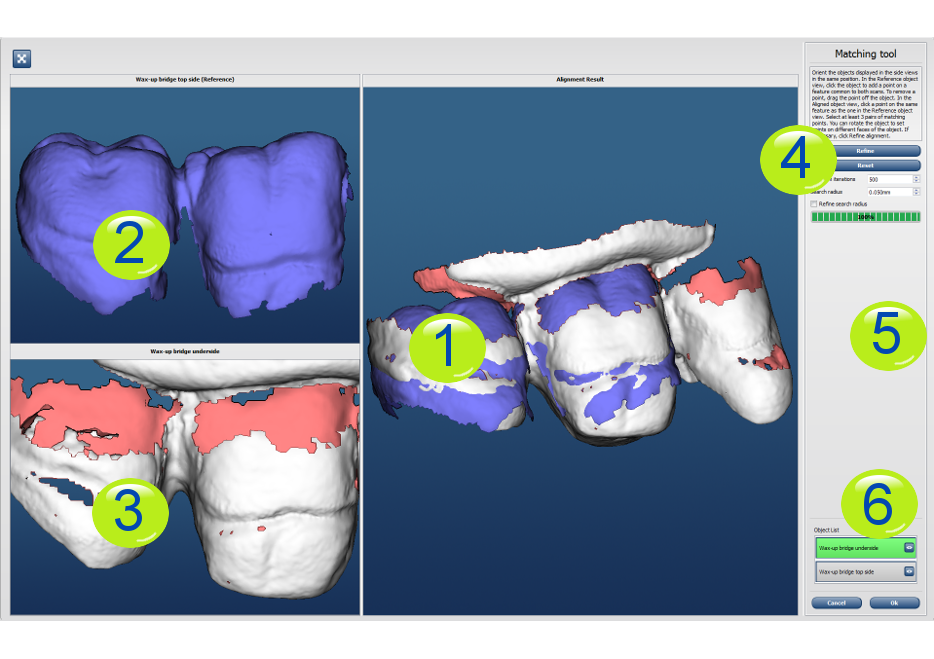
| 1 | Resulting match window | Actual matching result between the selected objects. (Notice the blotchy effect combining the objects' colors when accurate match is obtained). |
| 2 | Reference object view | The main object onto which the selected object is to be matched. |
| 3 | Aligned object view | Object from the list to match to the reference object. |
| 4 | Instructions section | Displays the basic instructions to perform the matching. |
| 5 | Action buttons and settings fields | Maximum
iterations: Number of iterations performed to match the scans. Maximum Search Radius: Determine the area around a point where the software will look for another point to match. Refine search radius: Increase or decrease the maximum search radius at each iteration to achieve better matching of scans. |
| 6 | Object list | This list contains the individually scanned objects. Select in this list the object to match to the reference object. |
