Attachment positioning tool
The Attachment positioning tool  allows you to place attachments on a bar.
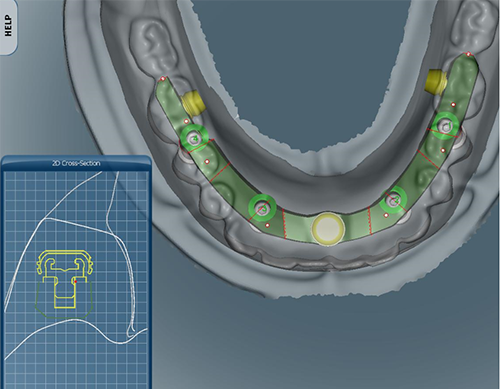
Attachments are used to secure the removable prosthesis on the bar. You can add attachments on all bars for removable prosthesis. You have the ability to add, remove, move attachments on a bar as well as to change the thickness of the bar around the attachments.
An attachment can be added for round, Dolder, Hader, Free-form milled, and Paris bars. Depending on the type of bar being designed, the displayed options will vary.
Click Attachment positioning . If the attachment positioning tool is activated, the  icon will be highlighted in green.
Positioning an attachment
To add an attachment:
Click ![]() on Top.
on Top.
Click Attachment positioning ![]() .
.
From the second drop-down list, select Placement mode.
Notes
To change the positioning of an existing attachment, select Selection mode, and drag the attachment to the new position. Click a second time to finalize the positioning of the attachment.
To remove an attachment, select Removal mode, and click the attachment.
To remove all the attachments, click Remove all.
From the Attachment positioning ![]() menu, select an attachment type from the third drop-down list.
menu, select an attachment type from the third drop-down list.
Click once on the position where the attachment should be added.
If necessary, slightly move the cursor.
Click a second time to finalize the positioning of the attachment.
The attachment is displayed on the bar.

Modifying an attachment
Click Attachment positioning ![]() .
.
Select a type of attachment from the Type column.
Use the arrows of the Height column to modify the height of the attachment.
Note
The attachment number is displayed in white in the 3D view.
Use the arrows of the Thickness around attachments option to increase or decrease thickness.
Note
For more information on all the attachment parameters, see Attachment positioning parameters.
The adjusted attachment is shown in the 3D view.