Model segmentation
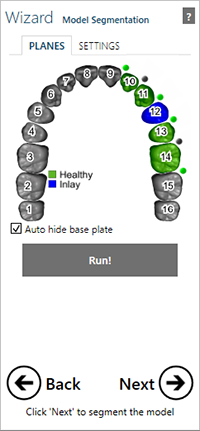
The segmentation of the model with plate is very similar to the traditional technique of model and die fabrication. Crowns and pontics will automatically be segmented.
With the Planes tab active, the image of the model can be used to toggle the segmentation or cutting planes on and off by clicking the grey or green dots. The red dots cannot be changed. They ensure a cut between stump/die and healthy/adjacent tooth.
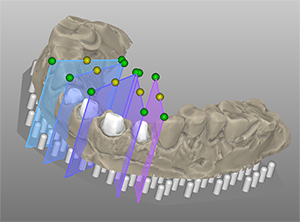
The planes are perpendicular to the plate. If you move a plane on a margin line, the plane will turn red and you will not be able to run the model segmentation.
To move the plane horizontally, click on the yellow control point and drag to the correct position.
To rotate the plane, click and drag the green control point on the labial/buccal or the lingual side.
To adjust the angle of the plane, hold down [Ctrl] and [Shift] and click and drag the colored plane surface.
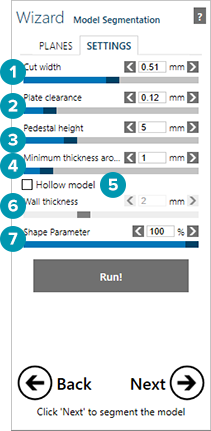
The Settings tab has parameters that affect the printed model itself.
| Setting | Description |
| Cut width [1] | Adjust the width of the cutting plane. |
| Plate clearance [2] | Adjust the depth and circumference cut around the pre-fabricated die pin. In the example below there is less (1) and more (2) plate clearance set.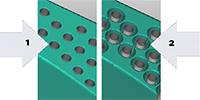 |
| Pedestal height [3] | 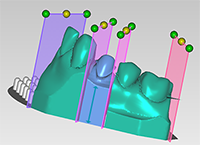 |
| Minimum thickness around the pin [4] | Set the minimum space between the pins. |
| Hollow model [5] | Select this checkbox to create a hollow model. |
| Wall thickness [6] | For a hollow model, the wall thickness can be adjusted. |
| Shape parameter [7] | Set the concavity depth below the preparation margin.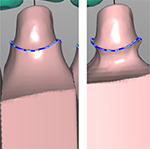 |
Once the model segmentation parameters are set, click Run.
If an antagonist is available, click Next to go to the model segmentation step for the antagonist model.
